There is so much I want to create and unfortunately, just not enough time to play. I’m still trying different projects to see what I enjoy making the most. I know I love the creativity involved in constructing journals. I love making mini albums from small paper bags, and I had a lot of fun most recently experimenting with my own shadow box. The common thread throughout my projects is paper. I heard someone call a crafter that enjoys creating with paper a “paper smith”. I like to think I found my calling as a “scrap smith,” using this and that and all the leftovers to make something beautiful. My most recent project was a Tim Holtz Configuration Mini Book which I made for my mother as a gift for her June birthday.
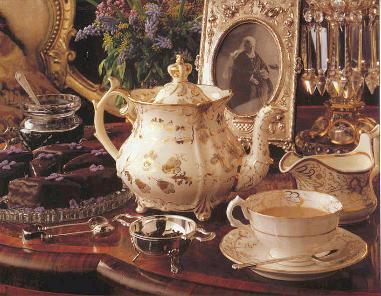
The inspiration came from looking at endless images on Pinterest and an adorable little shadow box my mother already has in her possession. Her shadow box is a sweet little bedroom complete with miniature slippers laying next to a small bed. She has it hanging (of course) in her bedroom, and I could look into that beautiful little bedroom all day and imagine transporting myself into a room just like that. I wanted to create my own “story” to get lost in, so I decided to head out to Michaels and purchase a configuration book. I knew I wanted to make something feminine, as it was for my mom, and whenever I think feminine I envision a Victorian house with “a place for everything and everything in its place,” or so the saying goes. I imagined pretty floral, intricate lace, fancy tea, and the simple comforts of home.
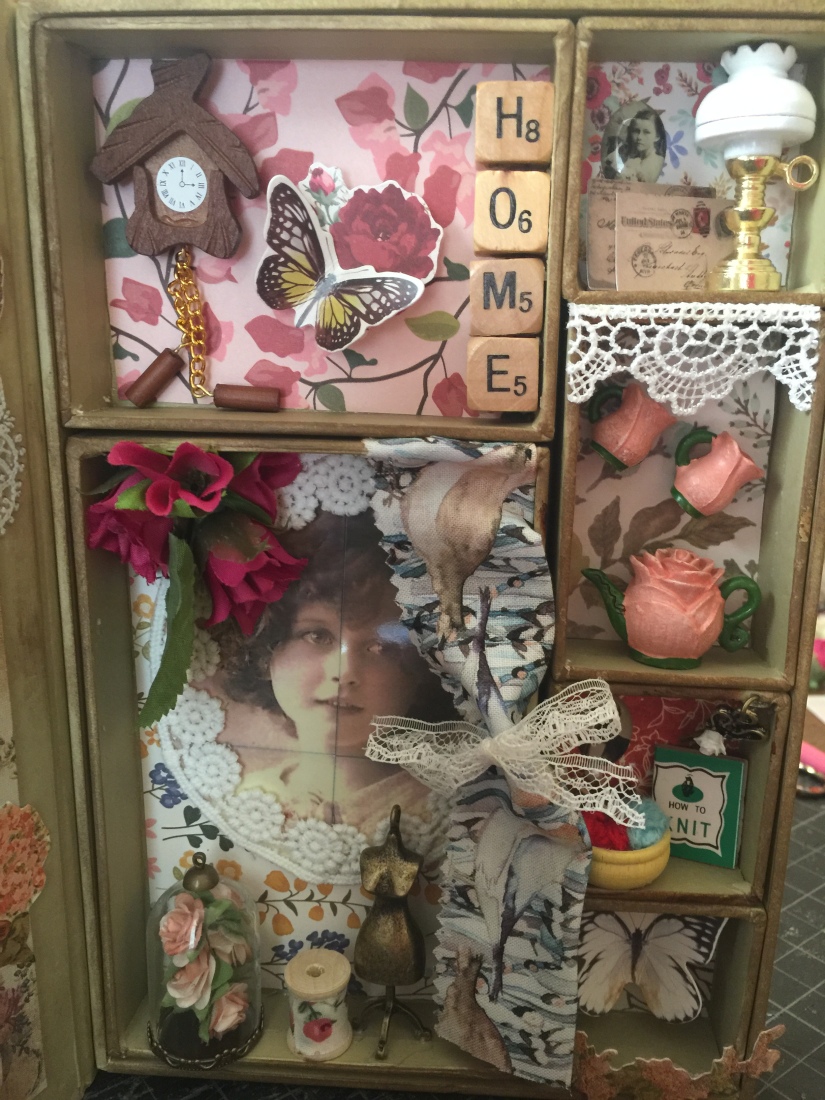
The simple comforts of home it would be, decorated in floral patterns, lace, and sweet vintage black and white photos, you know, the ones that have only a slight hint of color? I wanted to take the idea of my mother’s bedroom shadow box and create the feeling of a “home” with different “rooms”. Instead of depicting separate rooms, I decided to illustrate different areas of what you might find in one room. I wanted to create the illusion as if the viewer was “zooming” in on that particular area.
When I started, I really didn’t have any one particular room in mind. Looking at my finished project, I get the feeling that I’m looking into a ladies sitting room. There’s pretty floral wallpaper, soft botanical curtains, a white lace valence, a rose tea set, a wooden cuckoo clock, knitting needles and thread — everything I’d imagine a Victorian woman would want for a peaceful afternoon indoors!


My advice to those interested in making their own configuration box is: (1) choose the theme or “story” you wish to tell first and whether you have the supplies necessary or if you need to purchase them; (2) decide how you wish to organize your boxes in the book first, because it does make a difference (as I learned the hard way)! The square boxes can be made anyway you like because they have the same length and width, but make sure you know how the rectangular boxes will be displayed and make sure they fit in the book that way! (I had to redo the tea pot box and cuckoo clock box, but thankfully it was easy and I was able to reuse everything including the boxes). After I was happy with the way they looked individually, I glued the boxes in the book in a configuration that worked nicely. If you want, you can “bind” the edges of the boxes together by adding washi tape (to hide the areas where the boxes abut one another), but I decided to leave them as they were and just use a stamp to distress them a bit. Because I encluded fabric in my design and my boxes had multiple items displayed in each, I didn’t want to use washi because I thought it would make the inside appear too busy.
A third thing to keep in mind should you design your own configuration box: work on the outside cover first before gluing your boxes in place! Trust me, it will make it much easier to flip the empty, lighter cover around while decorating it. If you decide to use washi around the edges, I would recommend you do that first as well before adding your objects. Most likely you will have extra tape that you will press into the bottom and tops of the boxes, which would be difficult to do if you already glued down your trinkets.
For my cover, I wanted to add some dimension and additional flowers and lace to tie the whole thing together. Decide how you wish your book to be displayed. Consider this when designing your boxes as well. If you want your book to lay flat on a coffee table, make sure the objects you use aren’t wider than the box depth, otherwise the cover will not lay flat. If you decide to stand your book up with the cover open, feel free to use wider display objects like I did.


I love Tim Holtz paper and have been looking for an excuse to purchase a pad of his Wildflowers card stock for awhile now. This project seemed as good of an excuse as any and I used it on both the front and back covers as well as on the spine of the book. I also purchased his worn wallpaper as it seemed ideal for this kind of project, but unfortunately I discovered it after I already covered the back of my shadow boxes (don’t you hate when that happens)? I did find a place to utilize it as the background for the inside cover of the book, so I wasn’t too disappointed.
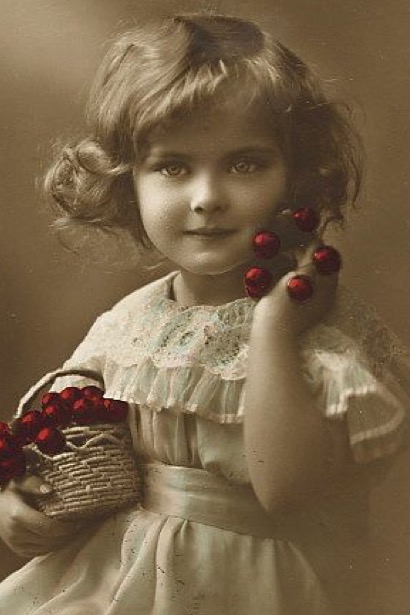
For the front cover, I used a cardboard “page” from a mini album I purchased and never used. I covered it with card stock and used the two holes at the top meant for ring fasteners to tie a knot with pretty lace ribbon. I raised the cardboard piece up even more with sticky dots, allowing room for the laced ribbon underneath so it wouldn’t stick up oddly. I printed a beautiful black and white picture of a girl with ruby red cherries (the one pictured at the beginning of this post) and settled her beneath a pretty mirrored frame. I surrounded her with flower and lace stickers and added a cute safety pin to my ribbon knot. I decided to use a small curio cabinet glass door knob as a means of opening the book and hung some skeleton keys from the same lace ribbon used for the knot described above.


I added some BoBunny ephemera and a “blessed” sticker to my spine and used Ranger Distress Ink in Vintage Photo around the edges and corners of the cover for added demention.
I wanted to keep the inside front cover simple so as to not take away from my shadow boxes. As mentioned previously, I used Tim Holtz worn wallpaper as the background with some simple ephemera, vintage photos, lace stickers, and more distress ink.


The last thing I did (before wrapping it of course), was create the illusion of “pages,” as illustrated in the third picture above. I simply used an x-acto knife to carefully make a slight cut in the box surface by running the blade gently down the three sides and adding a bit more distressing ink to make the pages “pop.”
I hope I have inspired my readers to create their own “story books” to get lost in. To be creative, you need to use or develop your imagination and this project is perfect for that.
Happy crafting everyone!
P. S. Happy Birthday Mom! I hope you like your Victorian “sitting room”! 💗
For this project I used:
🌹Tim Holtz Mini Configuration Book (Michaels)
🌹Tim Holtz Worn Wallpaper (Jo-Ann Fabrics)
🌹 Wildflower scrapbook paper by American Crafts (Tuesday Morning)
🌹Simple Life scrapbook paper by Jen Hadfield (Tuesday Morning) and matching stickers (AC Moore)
🌹Graphic 45 Children’s Hour scrapbook paper (Tuesday Morning)
🌹 Tim Holtz Wildflower card stock (Jo-Ann Fabrics)
🌹Simple Stories scrapbook paper (Tuesday Morning)
🌹Tim Holtz Idea-ology jeweled charms (Jo-Ann Fabrics)
🌹K & C Company Susan Winget Botanical Flower Layered Accents (Michaels)
🌹Recollections lace flower stickers (Michaels)
🌹BoBunny ephemera (Tuesday Morning)
🌹Tim Holtz Botanical Layers and other ephemera (Jo-Ann Fabrics)
🌹Tim Holtz mini paper clips (Jo-Ann Fabrics)
🌹Recollections chipboard album (Michaels)
🌹Ranger Distress Ink in Vintage Photo (Jo-Ann Fabrics)
🌹Tim Holtz Idea-ology Decorative Domes (Jo-Ann Fabrics)
🌹Tim Holtz Idea-ology Curio Knobs (Jo-Ann Fabrics)
🌹Tim Holtz Trinket Pins (Jo-Ann Fabrics)
🌹Metal skeleton keys (“bargain bin” at Michaels)
🌹Celebrate It Miniature Floral Tea Set (Michaels)
🌹Timeless Minis Miniature Hurricane Lamp (Michaels)
🌹Sparrow Innovations Miniatures Knitting Supplies (Michaels)
🌹Sparrow Innovations Miniatures Wood Cuckoo Clock (Michaels)
🌹Pemberley Sewing Charms by Bead Landing (Michaels)
🌹Rose picks (Jo-Ann Fabrics)
🌹Recollections white lace frame sticker (Michaels)
🌹Tim Holtz Idea-ology Alpha Dice (Jo-Ann Fabrics)
🌹Recollections Mini Pink Paper Rose Embellishments (Michaels)
🌹DCWV Mini Adhesive Mirror – Ornate Frame (Jo-Ann Fabrics)
🌹Fabric strips (Jo-Ann Fabrics)
🌹Left over lace ribbon from one project or another
